| Sage Accpac ERP | ||||||||||||||||||
| Q – Can I print a monthly check register in Accounts Payable?
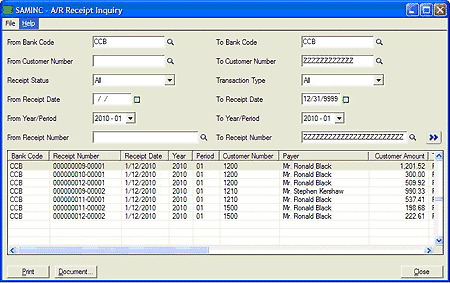
A – Beginning with Accpac version 5.3, an Accounts Payable Payment Inquiry Form has been added that allows you to display information for all the payments from a selected bank for range of fiscal year & periods as well as a range of payment dates. For a monthly check register, specify the date range in the From and To Check Date fields as shown below. The Payment Inquiry also allows you to look up payments using other criteria. For example, can display information for a payment for which you have only the payment number. In addition, you are no longer limited to viewing the payments for one vendor at a time in the Vendor Activity form.
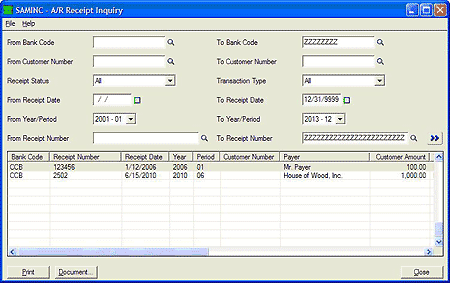
Note: You may also drill down from a selected line on the list to view the original payment in the Payment Entry form by clicking the Document button. Q – Can I view a list of all the Accounts Payable Miscellaneous Payments that have been posted? A – Beginning with Sage Accpac ERP version 5.3, an Accounts Payable Payment Inquiry Form has been added that allows you to display information for all of your miscellaneous payments. On the form, make sure there are blanks in both the From Vendor Number and To Vendor Number.
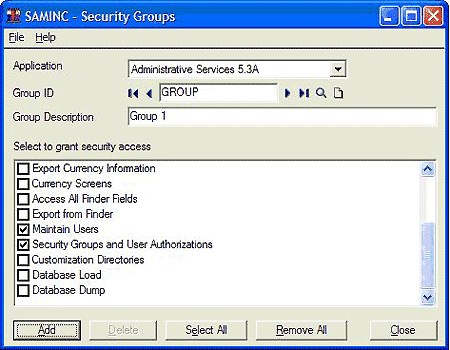
Note: You may also drill down from a selected line on the list to view the original payment in the Payment Entry form by clicking the Document button. Q – Can you assign a User other than the Admin User the security authorization to add, delete, or modify the User records, Security Groups, and User Authorizations under Administrative Services? A – In Sage Accpac ERP version 5.3, it is possible to give these security rights to any User. As seen below, there are the Maintain Users, Security Groups and User Authorizations settings available for the Administrator User to add to any Security Group. Once that Security Group is assigned to a User, that User will have the rights to modify the User, Security Group, and User Authorization records.
Note: The Administrator is still the only user with rights to modify the Admin record. |
||||||||||||||||||
| Sage Accpac CRM | ||||||||||||||||||
| Q – Can CRM be setup to allow an assistant to manage their supervisor’s Calendar?
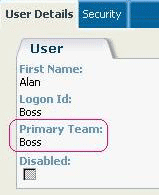
A – In order to achieve this, the Assistant will be managing the Supervisor’s Calendar from Team CRM. This means that a Team needs to be created to be used specifically for the Supervisor’s Appointments and Tasks. Note: No one else other than the Assistant or Supervisor can be assigned to this Team. For this example, a Team called “Boss” is created. For the Supervisor, this “Boss” team should be set as the Primary Team. When this is set, every time the Supervisor creates an Appointment, the communication record will be automatically set under team “Boss”.
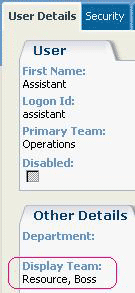
For the Assistant, the team “Boss” can be set in the Primary Team field or have team “Boss” under the Display Team area. If the Assistant has team “Boss” under the Display Team area this means that the assistant will be able to select team “Boss” from the Team CRM area. It also means that when the assistant creates an Appointment for the Boss, the assistant will need to make sure team “Boss” is selected.
All Users in the system should have the setting of Team List: set to “User’s Team”. This means that when they are in the Team CRM area, they can only select Teams and view the Communications for their Primary Team and what is set under Display Team. This setting is found under the User Details area.
When the Assistant creates appointments for the Boss, the assistant should be selecting team “Boss”.
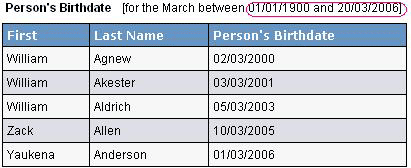
However, if the Assistant is creating their own appointments, the assistant does not need to select team “Boss”, especially if the assistant wishes to keep their appointment separately. The assistant doesn’t have to select a Team if they don’t need to see it in the Team CRM area. The assistant will see their appointments under My CRM > Calendar/Task. Also, when the Supervisor creates their own appointments, they should be creating them under the team “Boss”, so the Assistant can view it under the Team CRM area. Q – Can I search for all birthdays by month in CRM? For example, I would like to create list or report for all people with birthdates that fall in the month of March from year 1950 to 2006. A – This can be achieved either through a Target List or a Report.
|
||||||||||||||||||
| Sage Pro ERP | ||||||||||||||||||
| Q – Why can’t I export a report to Excel?
A – Assuming you have access to Excel, there are two main reasons why you can’t export a file to Excel. The first reason is that the report is a new standard report (not an existing report that has been modified) and Pro Series doesn’t recognize it yet. All standard report information is stored in a file SYRFRXS. When a new standard report is created, the programmer must enter the information in this file. The second reason a report may not export to Excel is that it is a “summary” report. Pro Series will only export reports to Excel that have detail lines. It is possible that a report that does not export to excel can be changed to allow excel export with some programming. Q – If a data entry person does not want to use the mouse, is there any other way to navigate around Pro Series? A – Yes. Many people who do a lot of data entry find moving from the keyboard to the mouse cumbersome and time-consuming. Pro Series has taken this into account. When you press the ALT key, you will see that the buttons will have a letter underlined. (It is usually the first letter). Press whatever letter corresponds to what you want to do and that button is activated. After some practice, you will be surprised how fast you can go! There are also a number of other keystrokes that aid navigation. The TAB key is the first of these keys. All of the screens and maintenances are programmed with a tab order to indicate what field is next if you press the TAB key. In addition, the enter key can be used to validate entry and move the focus to the next field for entry. Between the TAB and ENTER keys, you can navigate through the screen. In addition to the TAB and ENTER keys. The arrow keys will let you move within a specific field and between fields. In addition to the keys mentioned above, the PAGE DOWN key is extremely useful for fast entry. Pressing PAGE DOWN will focus screen to the next step in entry. For example, if you are printing a report and currently are entering options, the ‘page down’ will take you to the next group of options or to the generate button to generate the report. Another example is during sales order entry, pressing page down on the header will validate the header fields and move cursor to start of line item input. Pressing page down during the input of a line item will save that line and move cursor for start of entry of next line item. |
||||||||||||||||||
| Sage Accpac HR | ||||||||||||||||||
| Q – How do I edit the COBRA letters?
A – First, you need Microsoft Word 97 or higher. You can edit individual notices or the COBRA Notice Templates for permanent changes:
|
||||||||||||||||||
| Back to Top^ |
Search The Site
RSS & Newsletter Subscription
Axis Videos
-
Recent Posts
Categories
Blog Archives





 Download our corporate brochure for more facts about us, our
clients and our solutions.
 Driving Revenue Growth 1
 Satisfying Customers 1