In the latest release of Sage Pro ERP 7.4, there are four new and exciting features in the General Ledger module that provide flexibility and improved functionality to this core module.
The first new feature is an expanded GL account structure. There are two options for the account structure:
- A standard account structure that is 36 characters in length with a maximum of 10 segments.
- A user-defined account structure that is 90 characters in length with a maximum of 15 segments.
By giving the user options on the account structure when setting up the General Ledger, the General Ledger accounts are much more versatile and accommodating than before.
The second new feature is the ability to release applications to General Ledger from within General Ledger at the same time. This provides the user with convenience because the release is now done from General Ledger instead of from the subledgers.
The first step is to create a Release Preference. This is a one time set up that is provides the parameters for the release. In the General Ledger module, select Maintain > Release Preferences.
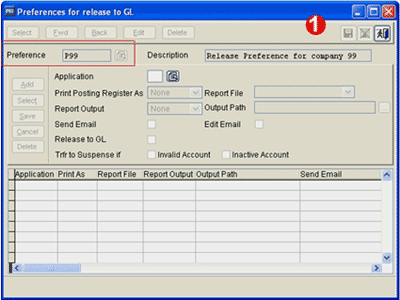
1. Enter a preference code and a description. In this example, we will create preference code P99.
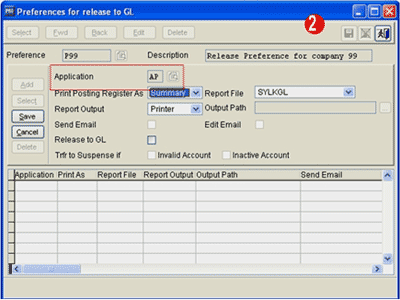
2. Enter the module that you want to release to General Ledger. In this example we will start with Accounts Payable. Enter the following:
Print Posting Register As: You have the options of detail, summary, or none.
Report Output: You have the options of Printer, PDF or none.
Output Path: If you select PDS as the report output, this field allows you to save the PDF to disk.
Send Email: If you selected PDF as the report output, then if you check this field the PDF report is automatically sent as an email attachment.
Edit Email: If you selected Send Email, then by checking this field a screen appears where you can enter email information.
Release to GL: Check this box to allow the release to General Ledger.
Trfr to Suspense if: Check Invalid Account and/or Inactive Account to automatically post entries having invalid/inactive account information to the suspense account that is designated in GL setup. If this box is unchecked, if invalid/inactive accounts are contained in the release process, the process is aborted.
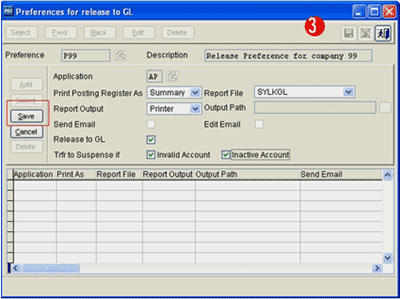
3. Once you have filled out all of the fields, click on the Save button on the left hand side. You are now ready to enter the next module.
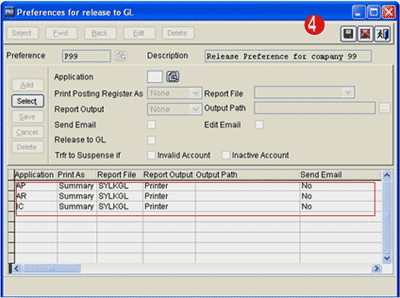
4. Once you have entered all of the modules for this preference, click on the green Save button in the upper right hand corner. Remember, this is a one-time setup.
Now we can discuss the process of releasing the applications to the General Ledger module. In General Ledger, select Transactions > Release Applications to GL.
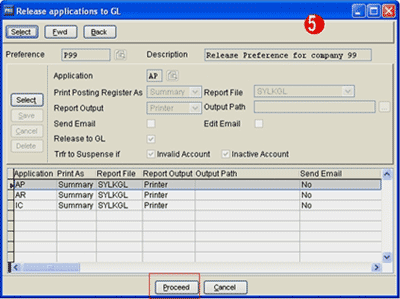
5. Select the preference and then click on the Proceed button. You will see the status and processing time of the release to General Ledger.
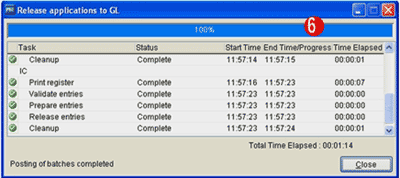
6. Once the release is completed, you can close the window. The batches are now ready to be posted.
The third new feature is an enhanced drill down that makes use of the notes from either the subledgers or batches created in the General Ledger module. This provides information that is very useful for the audit trails.
Go to Maintain > Accounts > Single Accounts.
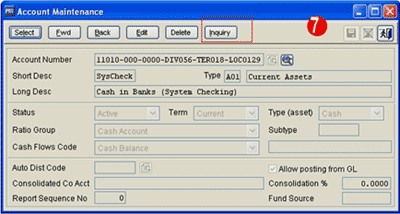
7. Select the General Ledger account that you want to drill down from. In this example, we will use the checking account. Click on the Inquiry button.
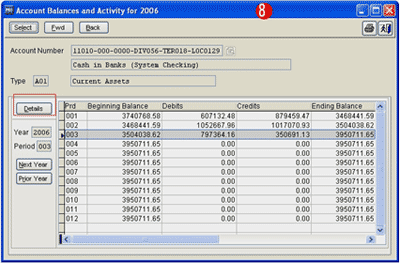
8. Select the year and period and then click on the Details button.
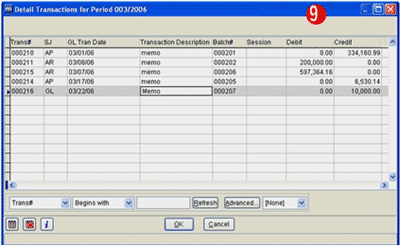
9. Select the line that you are interested in and double click on the Transaction Description column.
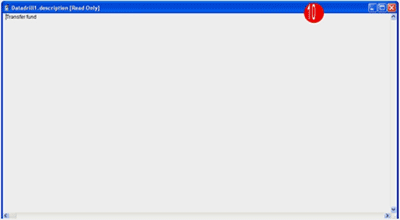
10. You will see the information that was entered in the subledger or General Ledger for this entry.
The fourth new feature is a Copy From option when creating a new batch. This feature allows users to copy from a posted or an option batch, which makes the data entry much easier.
Select Transactions > Create Batch Journal.
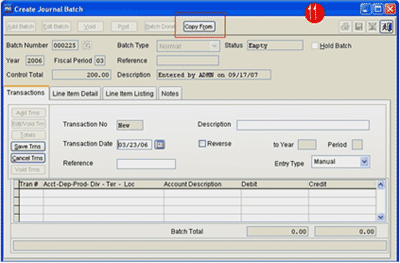
11. Enter the information on the Transaction tab as you would normally. Then, click on the Copy From button.
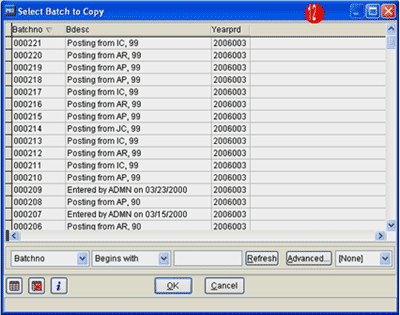
12. Select the batch that you want to copy and click OK.
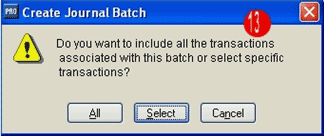
13. At this point you can decide whether to include all the transaction within the batch or only certain transactions.

14. If you chose Select, a screen appears where you will select which transactions to copy by placing an X in the first column.

15. Whether you chose All transactions or Selected transactions, you will be asked if you want to reverse the original entries.
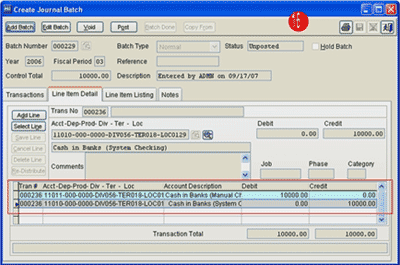
16. Once the transactions are in the new batch, you can edit or delete these transactions as you would any other transaction. Additionally, you can add more transactions to this batch.
As you have seen, the new functionality in the General Ledger module of Sage Pro ERP 7.4 provides flexibility and makes processing easier while adhering to GAAP standards.
If you have any questions or need additional assistance, please contact your AXIS consultant or email us at info@axisgp.com for more information.


 Download our corporate brochure for more facts about us, our
clients and our solutions.
 Driving Revenue Growth 1
 Satisfying Customers 1