In the latest release of Sage Pro ERP, the period-close process has some added functionality. There are now three separate routines that you can choose to allows for greater flexibility to tailor the system to match your business. These routines can be run at separate times based upon the needs of your business.
The first routine updates the period (or year-end) data:
This is accessed through System Manager, Transactions, Close Period.
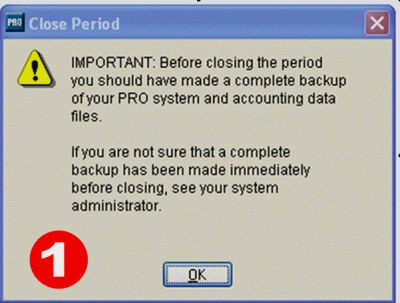
1.When you make this selection, you are reminded to backup all the data.
There is a new option grid that allows you to closed all the periods at once, although each company must be closed seperately.
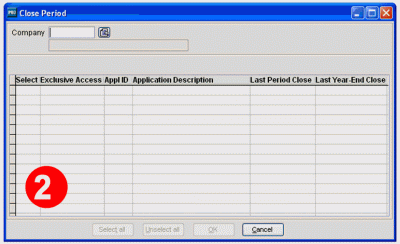
2. You will be prompted to select the company:
Click on the pull down and select the company.
Note: If General Ledger is not installed for the selected company, you will see the following option at the top of the Close Period dialog box:
Advance Current Fiscal Period (followed by the current period and fiscal year): Check this option to advance the current period to the next period in the company’s fiscal calendar. You cannot advance the period if it is the last period in the fiscal calendar.
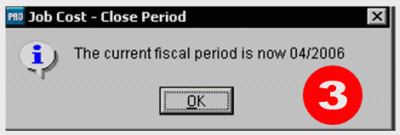
3. When the process is complete, a dialog displays the current fiscal period and year and that the applications are successfully.
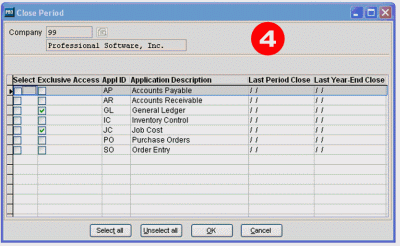
4. An option grid then appears that shows all of the installed applications for that company
Select the application (s) you want to close the period for. Use the <Spacebar> to mark or unmark an application.
- Select All to close the period in all the applications.
- Unselect All to clear any selected applications.
Once all the applications have been selected, click OK to continue.
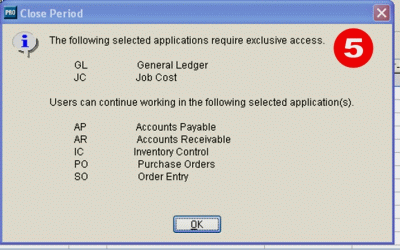
5. The informational screen displays the processes and status.
When you click OK, the closing process goes through each module and you will be asked the closing questions that were in previous versions of Sage Pro ERP.
The second routine archives transactions seperately from closing the period:
The Archiving Transactions menu option is used to move transactions to history. Users can select a company, and then archive transactions for multiple applications within the company. A transaction exists in either the current or the history file, but never in both
files.
In previous releases of Sage Pro ERP, when you closed the period or year, the closing process moved all the records to the history file and left the open records (such as unpaid invoices, open sales orders, etc) in the current file. Thus, these records were in both files and marked as such. With Sage Pro ERP 7.4, the records reside in either one file or the other because the only transactions that are moved to the archived files are the ones that are closed.
By archiving the transactions on a consistent basis (i.e. every month), the current files contain only the current information and makes reporting, inquiries and data drillers clean and clear.
You must use the Archive Transactions feature to move the records to history. This is accessed through System Manager, Transactions, Archive Transactions.
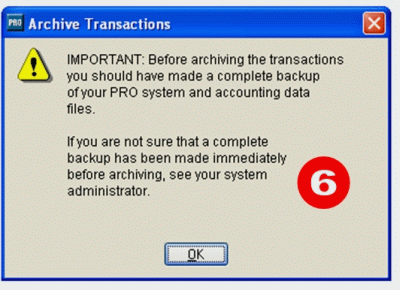
6. You are again reminded to make a backup.
An option grid appears asking you to select a company, Click on the pull down and select your company.
Once a company is selected, the installed applications for that company appear.
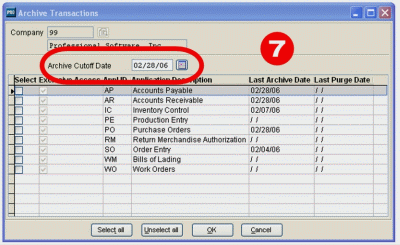
7. This is very similar to the Period Close selection, except that there is a cut-off date.
Enter an Archive Cutoff Date. The default is the last day of the previous period. For example, if today’s date is 10/15/06 and the current period started on 10/01/06,
the default date would be 09/30/06.
The system then goes through each selected application and asks the user if they are sure they want to archive the transactions.
The third routine purges transactions from the data files:
This option removes data from the archived transaction files. Users can select a company, and then purge transactions from archive for multiple applications within the company. This process does not remove records from the current transaction files.
This procedure will physically delete and remove records from the archived databases. Therefore, it will not be possible to access them via inquiries, data drillers or reports because the information will not exist.
The main reason to purge data is to free-up disk space and to speed up reports and inquiries. It is imperative that you are sure that the deleted data is not necessary. Once the data is purged, there is no way to retrieve it.
If there is any question, do not purge the transactions.
The process for deleting data is accessed through System Manager, Maintain, Purge Transactions From Archive. When this option is selected, you are reminded to backup your data. Additionally, there is a reminder that you are physically removing data from the archived files:
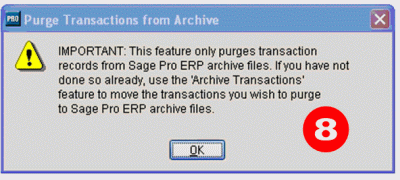
8. You will also see a reminder that you are physically removing data from the archived files. When you click OK, an option grid appears asking you to select a company, Click on the pull down and select the company.
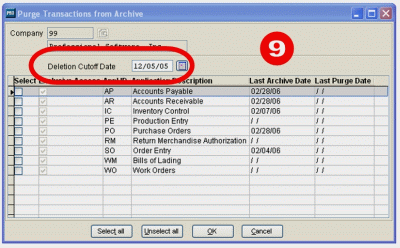
9. When you click OK, an option grid appears asking you to select a company, Click on the pull down and select the company.
The default deletion cutoff date is one year prior to the current date. For example, if today’s date is 10/15/06, the default date would be 10/15/05.
Select the application(s) you want to purge history for and click OK.
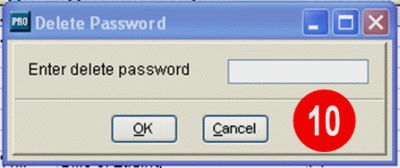
10. You will be prompted to enter the delete date password.
After selecting OK, you will be asked to verify that you want to purge these records. When you select Yes, the system will purge the archived transactions based upon the deletion cutoff date.
As you can see, the added functionality of the period close routine as well as the archiving transactions and purging those archived transactions gives you greater control and flexibility over your data and accounting system.
If you have any questions or need additional assistance, please contact your AXIS consultant or email us at info@axisglobalpartners.com for more information.



 Download our corporate brochure for more facts about us, our
clients and our solutions.
 Driving Revenue Growth 1
 Satisfying Customers 1